
Updated July 10, 2026

3D Roofs Editorial Team
Editorial Standards
How to diagnose and repair roof flashing in Wisconsin
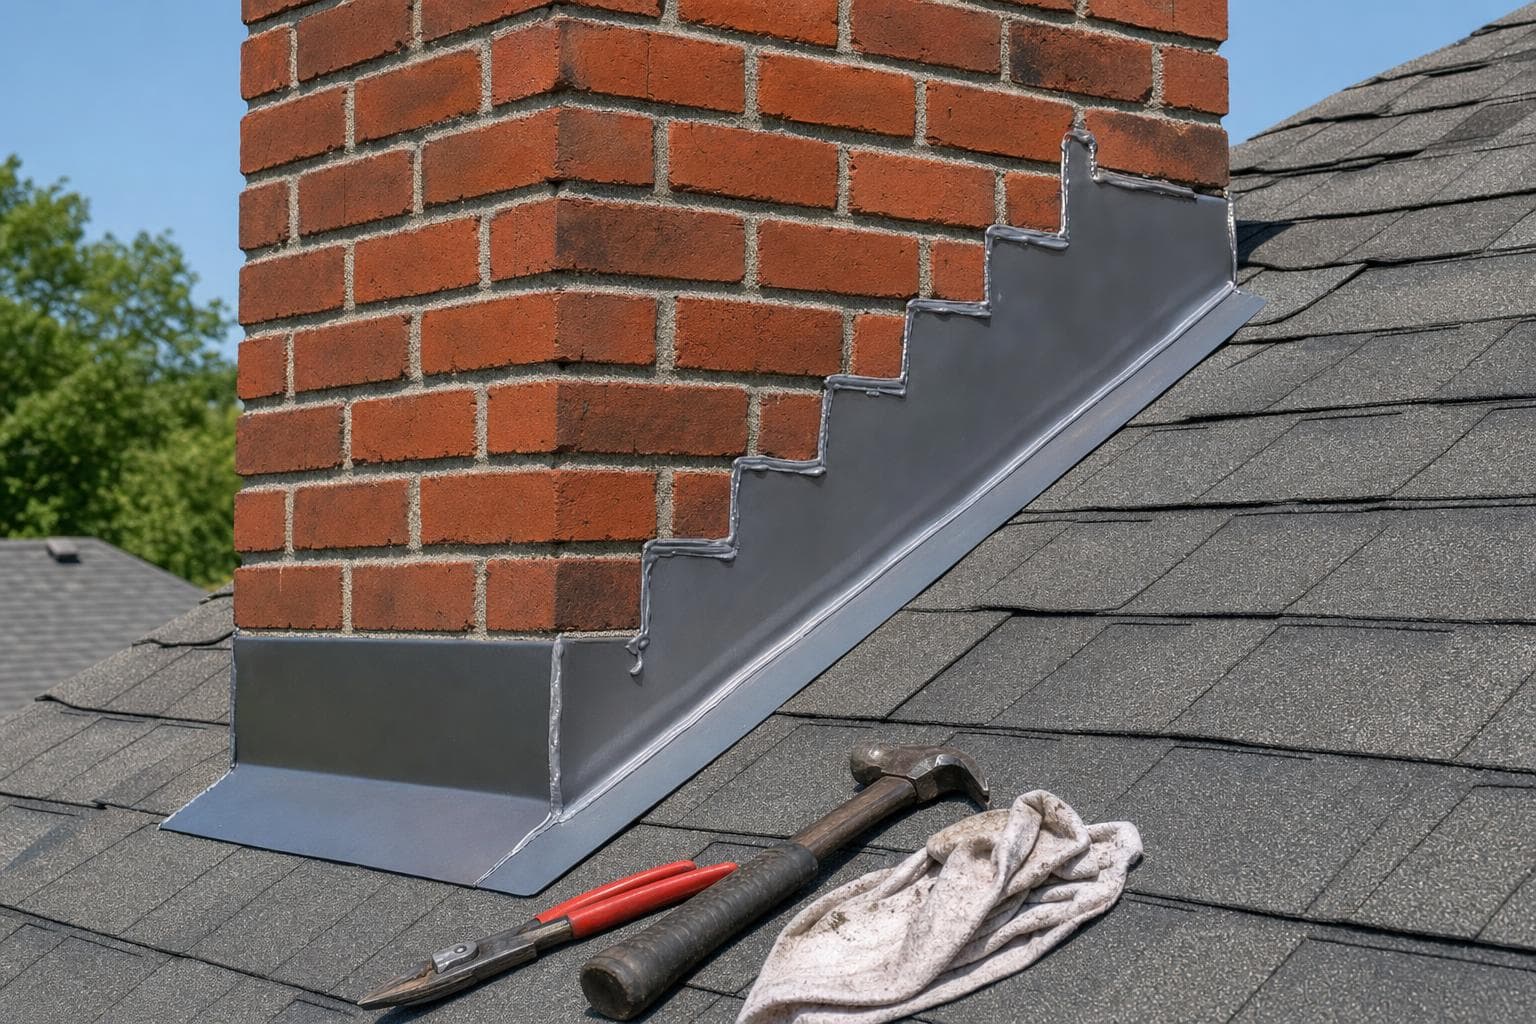
Flashing failures can involve corrosion, movement, open laps, missing counterflashing, poor integration with siding or masonry, reused metal, fasteners, sealants, or damaged roofing around the transition. The visible gap may not be the only problem. A useful repair opens enough of the area to see how water is entering and how the layers should overlap.
Ask which flashing component failed, what adjacent roofing or wall material must be removed, whether the metal will be reworked or replaced, how the new layers will lap, and who restores siding, stucco, masonry, or interior finishes. Require photographs before the detail is covered.
How Wisconsin exposure tests roof transitions
Wisconsin roofs take a beating from freeze-thaw cycles, heavy winter weather, summer storms, and wind. Snow and ice can stress shingles, flashing, and roof edges. Wind and hail can loosen or remove roofing materials. Rain can then work into those weak spots and turn a small issue into interior damage. In older homes, roof work can also overlap with lead-safe renovation concerns when paint-disturbing work affects pre-1978 housing.
Flashing in Wisconsin has to accommodate local rain intensity, wind direction, snow or ice, heat, freeze-thaw movement, corrosion exposure, and roof geometry. A repair should address those forces through laps, clearances, diverters, counterflashing, and drainage rather than depending on exposed sealant alone.
What a complete flashing-repair scope should cover
Flashing repair is detail reconstruction. The roofer should identify the exact transition that failed, expose enough roofing or cladding to see how water bypassed it, and rebuild the metal and layering so gravity moves water past the joint. Compare diagnosis, demolition, metal and membrane, integration with roof and wall materials, sealant location, fasteners, drainage, finish restoration, photographs, and workmanship coverage. Different transition details should not be priced as if they were the same patch.
Layers and responsibilities to define
- Interior and attic water-path review when relevant and accessible
- Identification of the exact wall, chimney, skylight, valley, curb, vent, pipe, edge, or intersection
- Removal of enough roofing or adjacent finish to inspect metal, laps, fasteners, underlayment, and deck
- Reworked or replacement flashing integrated with the surrounding water-shedding layers
- Disturbed roofing, siding, trim, masonry, curb, or penetration restoration responsibilities
- Opened-condition and completion photographs plus concealed-work approvals
Conditions that change flashing cost
- Transition type, geometry, and whether custom metal must be formed
- Roof height, pitch, stories, staging, and safe access
- Amount of roofing, siding, trim, masonry, or sealant that must be opened
- Whether metal can be reworked or needs complete replacement
- Underlayment, decking, framing, insulation, or interior moisture found
- Work coordinated with siding, masonry, skylight, drying, or interior trades
What to resolve before the detail is opened
Compare flashing proposals by location, metal to be reused or replaced, shingles or siding to be opened, underlayment and deck work, masonry involvement, and finish details. Surface caulk alone is rarely a complete scope for failed step, counter, valley, or curb flashing.
- The proposal names no specific transition or water path
- Surface caulk is the complete plan for failed metal or reversed layers
- The scope does not say what surrounding roofing or finish will be opened and restored
- Siding, masonry, skylight, deck, or interior responsibilities are left undefined
- No photographs or approval process exists for concealed water damage
- Which transition failed, and how does the evidence support that diagnosis?
- What roofing, metal, underlayment, deck, siding, masonry, trim, or penetration material will be opened?
- Can the existing flashing be integrated correctly, or why does it need replacement?
- How will the completed layers shed water without depending on exposed sealant alone?
- Who restores adjacent finishes and handles concealed moisture or deck work?
What flashing repair costs in Wisconsin
A straightforward flashing repair commonly runs $350-$2,050 in Wisconsin. Chimneys, skylights, valleys, walls, steep access, and wet decking move higher because more roofing or adjacent finish has to be opened and rebuilt.
- Flashing repair at a wall or vent
- The transition is opened and correctly rebuilt, not just caulked over
- $350-$2,050
- Valley leak repair
- Both slopes are opened and the water-shedding channel is restored
- $550-$3,250
- Chimney or skylight flashing
- These transitions require careful opening, flashing, and tie-in work
- $850-$4,700
- Repair with limited decking replacement
- Contained carpentry plus restoration of the roofing assembly above it
- $1,200-$7,300
Cost ranges are estimates developed from standardized project scopes and reviewed pricing inputs. Government labor and regional cost data are used where applicable. See our Pricing Methodology for the exact sources, calculations, and review date. Actual prices vary by property, scope, materials or equipment, location, and provider.
Rules, claims, and contractor checks
Flashing work may cross roofing, siding, masonry, window, or mechanical scopes and can require local permits or qualified trades. Confirm responsibility for every opened surface and review Wisconsin contractor requirements before work begins.
Start your claim right away and document the damage
After a storm, notify your insurance agent or insurance company right away to begin the claim process. Make a list of damaged items for your adjuster, take photographs of the damage, keep swatches of damaged material when possible, and keep all receipts that document repair or replacement costs.
Do not throw out damaged property before the adjuster agrees
You should not throw out damaged property without the claim adjuster’s agreement. If local officials require disposal for safety reasons, photos and swatches can help support your claim.
Some water losses are not covered by a standard homeowners policy
Most homeowners policies do not cover flooding or seepage through the foundation. A separate flood insurance policy is necessary for that coverage. Damage from sewer backup or sump pump overflow is not covered by standard homeowners insurance or flood insurance, and requires a special endorsement on your homeowners policy.
In Wisconsin, roofing and other residential exterior work often ties into dwelling contractor credential rules. The state says no person may obtain a building permit for a one- and two-family dwelling unless that person holds a Dwelling Contractor certification or Dwelling Contractor Restricted certification, and holds or engages a person who holds a Dwelling Contractor Qualifier certification. After a storm, the state also tells you to take your time, step back if you feel pressured to sign quickly, and check for complaints before you hire. When you talk with a local roofing contractor you have vetted, ask who will pull the permit if one is needed, ask for the business name you should look up with the state, and ask how they handle documentation for your adjuster.
Sources: Wisconsin Office of the Commissioner of Insurance, After a Storm Hits · Wisconsin Department of Safety and Professional Services, Dwelling Contractor
Common questions about roof flashing repair in Wisconsin
Why does roof flashing fail in Wisconsin?+
Common causes include poor original lapping, reused metal, corrosion, thermal movement, loose fasteners, dried sealants, missing counterflashing, wall or masonry movement, and roofing deterioration around the transition. The repair should identify which condition is present.
Can roof flashing be repaired with caulk?+
Sealant is appropriate in some specified joints, but it should not replace the metal or membrane layers that shed water. If the flashing is corroded, loose, badly lapped, or not integrated with the wall and roofing, surface caulk alone is unlikely to be a durable repair.
What should a flashing repair estimate include?+
It should name the failed transition, demolition, adjacent materials, new metal or membrane, lapping and counterflashing method, sealants and fasteners, deck repair process, finish restoration, cleanup, photographs, and workmanship coverage.
Does flashing repair require replacing nearby shingles?+
Often some surrounding roofing must be removed to integrate the new flashing correctly, but the amount depends on the detail and material condition. Ask how the roofer will preserve or replace adjacent covering and whether compatible matching material is available.
Which Wisconsin rules should I check before signing a flashing repair contract?+
Start with the verified state guidance on this page, including Start your claim right away and document the damage; Do not throw out damaged property before the adjuster agrees; Some water losses are not covered by a standard homeowners policy. Then confirm the permit authority and any local contractor requirement for the property address. Insurance coverage and policy interpretation remain separate from the roofing contract.
Flashing Repair across 12 Wisconsin cities
Open the nearest Wisconsin city page for local rain, wind, heat, snow, and material context. The actual repair still depends on the transition design and the layers found when it is opened.