Updated July 10, 2026

3D Roofs Editorial Team
Editorial Standards
When you need roof flashing repair
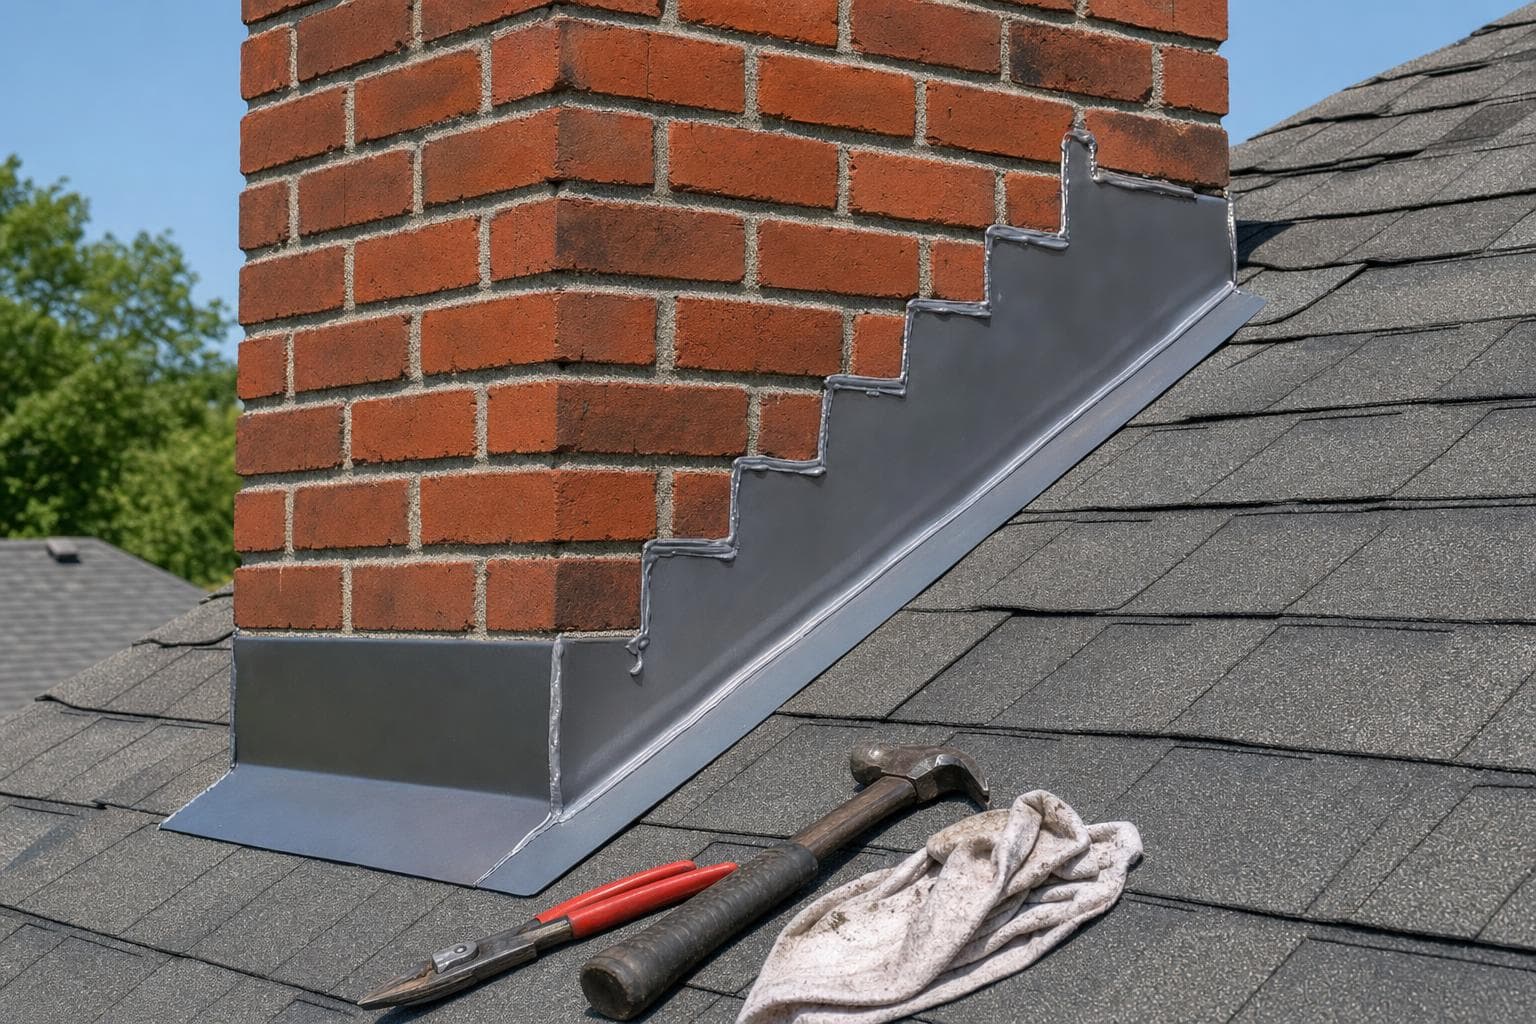
Flashing is the metal that seals every place the roof meets something else, a wall, a chimney, a skylight, a vent, a pipe, or another slope, and it's where most roof leaks actually begin, long before the open field of shingles wears out. It fails because it lives at the hardest-working part of the roof, the transitions, where water wants to collect: the metal corrodes, the sealant behind counter-flashing dries and cracks, fasteners loosen, and reused flashing from an old roof simply wears out. The frustrating part is that the shingles around a flashing leak usually look perfect, so the problem gets misdiagnosed and the same spot keeps leaking after each patch. A real flashing repair traces the leak to the failed detail, reworks or replaces it so water sheds past it instead of behind it, and checks the surrounding materials, because naming the actual entry point is the difference between a repair that holds and a smear of sealant that buys one season.
Begin with the interior or attic evidence and identify the transition above or beside that path. The proposal should define the metal, roofing, underlayment, deck, siding, masonry, trim, or sealant that must be opened and explain how the completed layers shed water without relying on surface caulk alone.
What a complete flashing-repair scope should cover
Flashing repair is detail reconstruction. The roofer should identify the exact transition that failed, expose enough roofing or cladding to see how water bypassed it, and rebuild the metal and layering so gravity moves water past the joint.
Layers and responsibilities to define
- Interior and attic water-path review when relevant and accessible
- Identification of the exact wall, chimney, skylight, valley, curb, vent, pipe, edge, or intersection
- Removal of enough roofing or adjacent finish to inspect metal, laps, fasteners, underlayment, and deck
- Reworked or replacement flashing integrated with the surrounding water-shedding layers
- Disturbed roofing, siding, trim, masonry, curb, or penetration restoration responsibilities
- Opened-condition and completion photographs plus concealed-work approvals
Conditions that change flashing cost
- Transition type, geometry, and whether custom metal must be formed
- Roof height, pitch, stories, staging, and safe access
- Amount of roofing, siding, trim, masonry, or sealant that must be opened
- Whether metal can be reworked or needs complete replacement
- Underlayment, decking, framing, insulation, or interior moisture found
- Work coordinated with siding, masonry, skylight, drying, or interior trades
What to resolve before the detail is opened
Compare flashing proposals by location, metal to be reused or replaced, shingles or siding to be opened, underlayment and deck work, masonry involvement, and finish details. Surface caulk alone is rarely a complete scope for failed step, counter, valley, or curb flashing.
Warning signs in a flashing proposal
- The proposal names no specific transition or water path
- Surface caulk is the complete plan for failed metal or reversed layers
- The scope does not say what surrounding roofing or finish will be opened and restored
- Siding, masonry, skylight, deck, or interior responsibilities are left undefined
- No photographs or approval process exists for concealed water damage
Questions the repair should answer
- Which transition failed, and how does the evidence support that diagnosis?
- What roofing, metal, underlayment, deck, siding, masonry, trim, or penetration material will be opened?
- Can the existing flashing be integrated correctly, or why does it need replacement?
- How will the completed layers shed water without depending on exposed sealant alone?
- Who restores adjacent finishes and handles concealed moisture or deck work?
What flashing repair costs
A straightforward flashing repair commonly runs $400-$2,100 nationally. Chimneys, skylights, valleys, walls, steep access, and wet decking move higher because more roofing or adjacent finish has to be opened and rebuilt.
- Flashing repair at a wall or vent
- The transition is opened and correctly rebuilt, not just caulked over
- $400-$2,100
- Valley leak repair
- Both slopes are opened and the water-shedding channel is restored
- $550-$3,300
- Chimney or skylight flashing
- These transitions require careful opening, flashing, and tie-in work
- $850-$4,750
- Repair with limited decking replacement
- Contained carpentry plus restoration of the roofing assembly above it
- $1,200-$7,500
Cost ranges are estimates developed from standardized project scopes and reviewed pricing inputs. Government labor and regional cost data are used where applicable. See our Pricing Methodology for the exact sources, calculations, and review date. Actual prices vary by property, scope, materials or equipment, location, and provider.
For size tables, worked examples, and the assumptions behind this range, open the roof flashing repair cost guide.
How a flashing leak should be repaired
A durable repair follows the water through the transition, removes failed materials, and restores the sequence of overlaps that keeps water outside the roof assembly.
- 1
Trace the transition leak
Use interior evidence and exterior inspection to identify the wall, chimney, skylight, pipe, vent, valley, or roof intersection involved. Check uphill and side laps because water can travel before appearing inside.
- 2
Open the detail
Remove enough surrounding roofing, trim, siding, or sealant to inspect the metal, underlayment, fasteners, and deck. Photograph corrosion, separation, poor laps, or prior patching.
- 3
Rebuild the water path
Replace or correctly reposition flashing and integrate it with roofing, underlayment, counter-flashing, or cladding in the proper order. Sealant supports laps and terminations but should not replace the metal detail.
- 4
Close and verify
Replace disturbed roofing and finishes, document the completed layers, and explain any masonry, siding, deck, or interior moisture work outside the roofing scope.
Why flashing leaks
Flashing works at changes in plane, material, and drainage. Leaks can begin when metal corrodes or moves, fasteners loosen, sealant at a designed termination fails, laps are reversed, step or counter-flashing is incomplete, a curb is formed incorrectly, or surrounding roofing and underlayment no longer integrate with the detail. The visible stain may appear away from the entry point, so interior and attic evidence should be traced back to the transition before repair.
Repair vs replacement
Sound metal may be reworked when it can be integrated with serviceable roofing, underlayment, walls, curbs, or penetrations using correct laps and fastening. Corroded, cracked, undersized, badly formed, incompatible, or incorrectly layered flashing generally needs replacement. The proposal should identify the exact condition, the materials opened, and why the finished detail restores drainage rather than relying on a new surface bead of sealant.
Define adjacent work before opening the transition
A flashing repair may disturb shingles or panels, siding, trim, masonry, skylight components, underlayment, decking, insulation, or interior finishes. The written scope should name which company or trade restores each material, how concealed water or deck damage is photographed and approved, and what remains outside the roofing price. Clear ownership prevents a technically correct piece of metal from being left incomplete at the wall or curb around it.
Common questions about roof flashing repair
Why does roof flashing leak?+
Flashing can leak when metal corrodes or moves, fasteners loosen, a designed sealant termination fails, laps are reversed, step or counter-flashing is incomplete, or surrounding roofing and underlayment no longer integrate with the detail. Because water can travel before becoming visible, the diagnosis should connect interior evidence to the exact transition rather than assuming the nearest surface mark is the source.
Where is flashing located on a roof?+
Flashing is used where the roof changes plane, meets another material, terminates, or surrounds an opening. Depending on the roof, that can include walls, chimneys, skylights, curbs, vents, plumbing pipes, valleys, edges, roof intersections, and some equipment penetrations. The inspection should follow the actual water path and roof design rather than assuming every leak begins at flashing.
How do I know if my leak is a flashing problem?+
A flashing problem becomes plausible when attic or interior evidence leads to a wall, chimney, skylight, valley, curb, vent, pipe, edge, or roof intersection. A roofer should trace the path, inspect uphill and side laps, and document the failed layer. Staining near a transition is a clue, not proof, because water can move across decking, framing, or underlayment before appearing.
Should flashing be repaired or replaced?+
Sound metal may be reworked when it can be repositioned, fastened, and integrated with serviceable surrounding layers. Corroded, cracked, undersized, incompatible, badly formed, or incorrectly layered flashing generally needs replacement. The proposal should identify which condition exists and explain how the completed metal, roofing, underlayment, wall, curb, or penetration will shed water.
How much does roof flashing repair cost?+
Cost depends on the transition, access, metal fabrication, and how much roofing or adjacent finish must be opened. An accessible wall or vent detail has a different scope from a valley, tall chimney, formed curb, or skylight on a steep roof. Corrosion, wet decking, siding, masonry, skylight parts, drying, and interior restoration should be identified separately when they extend beyond the roofing repair.
Can I just caulk the flashing to stop the leak?+
Sealant can be appropriate at a designed lap or termination, but it cannot restore missing metal, reversed laps, failed step flashing, open counter-flashing, wet decking, or an incorrectly formed curb. A complete proposal should identify the physical water-control detail beneath the sealant and explain what must be opened, reworked, replaced, and documented.
Get a Roof Flashing Repair Quote
Call to discuss leaks or damaged flashing, or share your project details to start a repair quote request.