Updated July 10, 2026

3D Roofs Editorial Team
Editorial Standards
A ceiling stain is evidence that water or moisture reached the finish. It does not identify the opening, prove the roof is the source, or show how large the repair should be. Water can move across the top of drywall, along framing, under roofing layers, around fasteners, through insulation, or down a penetration before becoming visible. Leak diagnosis is the process of building and testing a path from the symptom back to the failed detail.
Start with when and how the symptom appears
Timing narrows the possibilities. Note whether the stain changes during wind-driven rain, prolonged rain, a brief heavy downpour, snowmelt, freeze-thaw cycles, high humidity, plumbing use, HVAC operation, or no recent weather. Record wind direction when known, the delay between weather and dripping, whether the leak stops quickly, and whether the same condition has appeared before. A dry ring can preserve history without showing an active leak today.
- Photograph the full room and ceiling plane before the stain, then use closer images with a fixed reference point for later comparison.
- Mark the symptom on a floor plan and relate it to exterior walls, roof slopes, valleys, penetrations, additions, and mechanical equipment above.
- Record odor, discoloration, softened finishes, dripping, and moisture readings separately rather than treating them as one conclusion.
- Note recent roofing, siding, solar, satellite, HVAC, chimney, plumbing, window, or tree work that may have changed a nearby detail.
Rule out immediate safety and non-roof sources
A bulging ceiling, substantial active water, structural movement, wet electrical equipment, or fallen material can require emergency help and an exclusion zone. Do not puncture or pull down a wet ceiling based on general advice. Move belongings when the area is safe and use containers or floor protection away from electricity. Do not enter a wet, hot, cramped, pest-contaminated, or electrically unsafe attic.
Roof leaks can be imitated by plumbing supply or drain lines, HVAC condensate, bath and kitchen exhaust, masonry, windows, siding transitions, fire-suppression piping, and condensation on cold surfaces. The Department of Energy's durable-attic guidance describes both rain entry and indoor moisture paths. A roofer should recognize when the evidence points outside roofing scope and identify the trade or test needed next.
Use the attic to connect interior and exterior locations
Where access is safe, inspect the highest reachable evidence rather than assuming water traveled straight down. Look for changes in decking, fasteners, framing, insulation, ducts, and stored material. Trace stains upslope and across framing while remembering that underlayment, gaps, and obstructions can redirect water. Daylight can identify an opening, but its absence does not prove the roof is watertight. Rust and dark wood may be historical or condensation-related.
- Relate each attic observation to a roof feature using measurements, framing bays, photographs, or a simple sketch.
- Check whether insulation is wet at the top, throughout, or only near an air leak or duct, and avoid compressing or disturbing it unnecessarily.
- Identify plumbing, exhaust, HVAC, chimney, and electrical components that cross the same search area.
- State which surfaces were dry, inaccessible, concealed, or already altered by earlier repairs so the limits remain visible in the report.
Talk to a roofer today
Planning ranges, scope details, and a direct path to request a roofing quote.
Inspect roof details that fit the water-path hypothesis
There is no universal order of suspects. The roof geometry, weather behavior, material, and interior location determine the search. Review the field covering, but give equal attention to edges, penetrations, valleys, roof-to-wall transitions, chimneys, skylights, curbs, drains, low-slope tie-ins, additions, and earlier patches. Water often enters where systems meet, and those details may be concealed beneath surface sealant or overlapping materials.
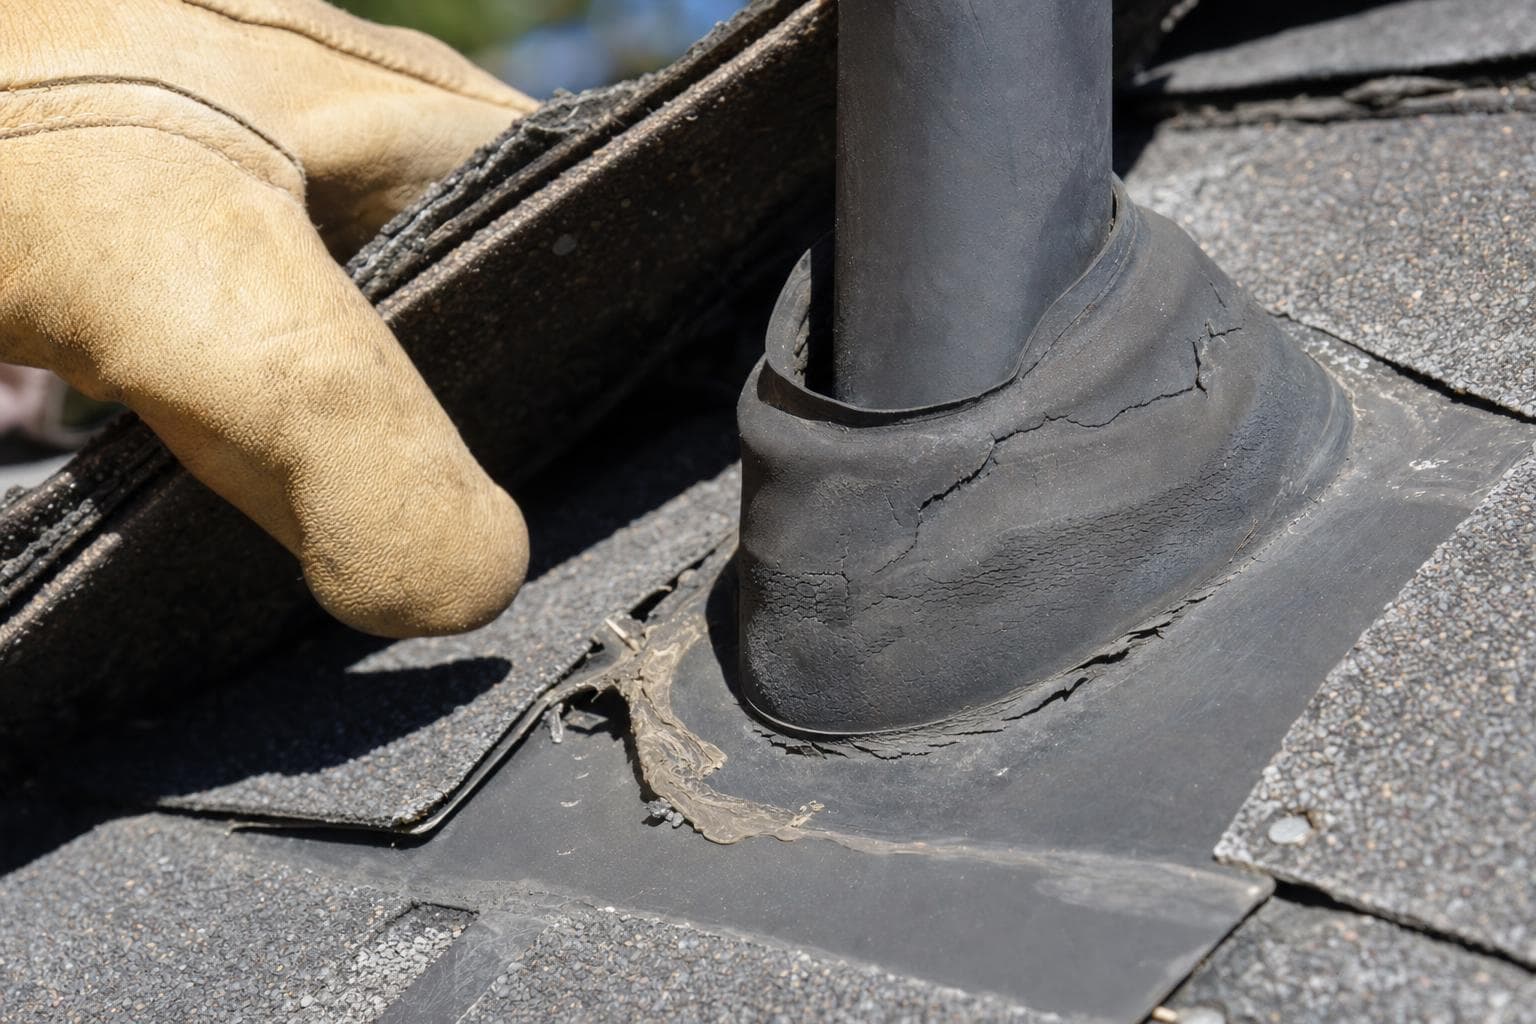
- At a plumbing penetration, review the boot or flashing, upper laps, fasteners, surrounding covering, deck response, and how water is diverted around the opening.
- At a wall or chimney, identify step flashing, counterflashing, cladding interface, kick-out or drainage termination, sealant role, and any concealed gap.
- At a valley, review material type, alignment, debris, cuts, fasteners, transitions, repairs, and the increased water volume delivered by both slopes.
- At a skylight or curb, separate glazing, condensation, frame drainage, perimeter flashing, roof integration, and interior shaft conditions.
- On low-slope roofing, review seams, penetrations, terminations, drains, scuppers, ponding areas, repairs, surfacing, and substrate response.
Use controlled water testing only when it can answer a question
A water test should follow a written hypothesis, not soak the whole roof. Testing may be inappropriate when weather, electrical conditions, fragile materials, interior finishes, mold concerns, occupied areas, or an already-open assembly create risk. Agree on who monitors the interior, who controls water, how communication works, when the test stops, and who is responsible for any opening or restoration.
When testing is appropriate, begin at the lower or simpler part of the suspected path, isolate one area or detail, use a controlled flow, allow enough observation time, and document each change before moving upward or outward. Introducing water to several details at once may reproduce the leak without identifying the source. A negative test also does not prove a detail is sound if the original wind, pressure, snow, temperature, or duration was not reproduced.
Know when limited opening is more honest than more sealant
Flashing, underlayment, deck edges, fastener placement, and transitions can remain concealed until material is removed. If observation and testing cannot distinguish between likely causes, a small documented opening may be the next diagnostic step. The authorization should define the area, temporary weather protection, expected findings, restoration, price, and approval process if the opening reveals a larger condition.
Surface sealant may be a specified part of some details, a maintenance item, or a temporary control. It should not be presented as a complete repair when the failed water-shedding geometry, flashing, lap, attachment, or substrate remains unidentified. Ask what the sealant bonds to, how movement and drainage are handled, what preparation is required, and whether the product is the primary defense or only a secondary joint.
Turn the diagnosis into a repair boundary
- 1Name the most supportable entry point or state what uncertainty remains.
- 2Identify every layer and adjacent component that must be removed to reach and rebuild the failed detail.
- 3Extend the work to material that is sound enough to remain and can accept the new tie-in without breaking or losing function.
- 4Set deck or concealed-work terms, photographs, authorization, and temporary dry-in before opening the roof.
- 5Describe how the completed detail sheds water and which sealants, fasteners, laps, or flashings require future maintenance.
- 6State what the repair does not address and the specific condition that would justify a larger section or replacement.
When does one leak support a larger project?
One symptom can still reveal a repeated construction defect, damaged underlying layer, broadly unrepairable covering, or several connected transitions that need a larger boundary. Multiple stains can also trace back to one uphill opening. Count and age alone do not decide. Map distribution, test repairability, identify how much material must be disturbed, and explain why a focused repair can or cannot reach sound work.
What the leak report should say
- Symptom history, weather behavior, interior location, methods used, roof areas reviewed, and access limitations.
- Overview and detail photographs that connect interior evidence, attic observations, and exterior features.
- The leading cause, alternatives considered, results of any moisture readings or controlled tests, and remaining uncertainty.
- Temporary protection completed, the proposed permanent repair boundary, concealed-work process, and follow-up trigger.
- Non-roof findings or specialist referrals kept separate from the roofing estimate and any insurance coverage question.
The stain is the symptom map. The repair belongs at the diagnosed entry detail and must extend far enough to tie new work into sound roofing.
Related reading and sources
Related roofing resources
Related services
Updated July 10, 2026
3D Roofs Editorial Team
Editorial Standards