Updated July 27, 2026

3D Roofs Editorial Team
Editorial Standards
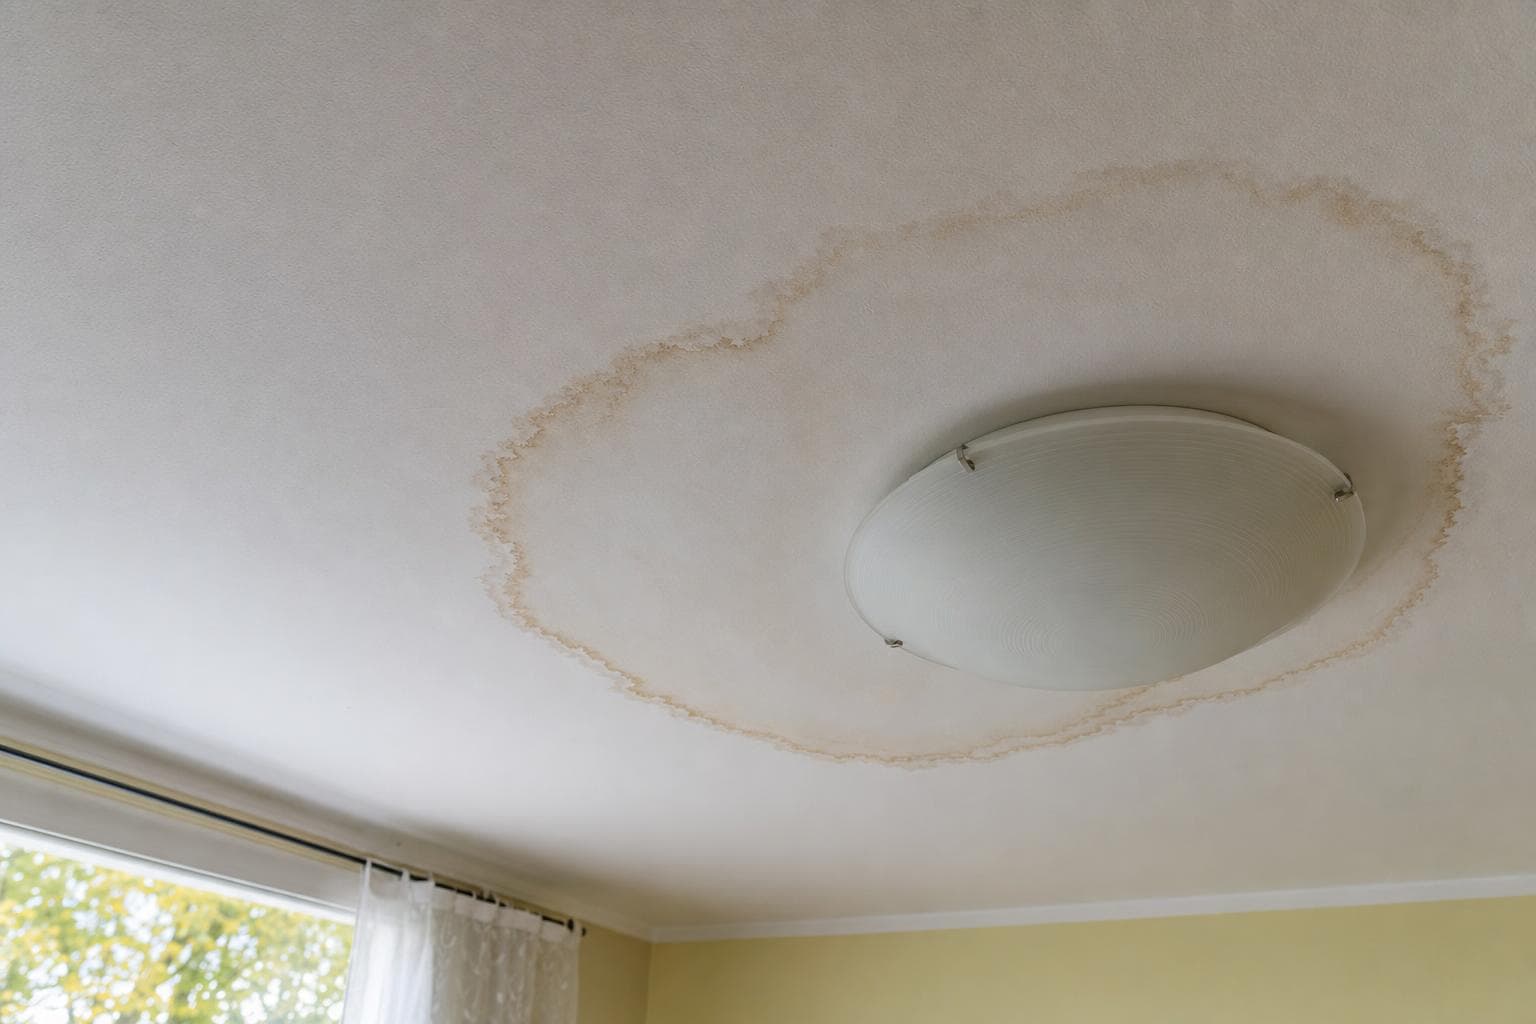
A ceiling stain raises two immediate questions: how active is the moisture, and where is it entering? Its color, edges, location, and timing can help narrow the possibilities, but the visible spot is not always below the roof opening. Water can move along decking, framing, insulation, pipes, or other surfaces before it reaches the ceiling, so diagnosis should trace the path instead of assuming the source.
Active leak or old scar?
- Damp to the touch, darker in the middle, or visibly spreading after rain: active. Move to triage.
- Dry, coffee-colored ring with crisp edges: a past event, possibly already fixed, possibly seasonal (ice dams, wind-driven rain from one direction).
- Multiplying rings like tree growth: recurring leak that wets and dries repeatedly. A stain that changes during a particular weather condition is useful timing evidence and should be documented promptly.
- Sagging, soft, or bubbling drywall: water is pooling above the paint. That's urgent, relieve it with a small puncture over a bucket before it chooses its own exit.
Reading location and timing
Stains near exterior walls point at step flashing, gutters backing up, or ice dams. Stains mid-room sit below penetrations, plumbing vents, attic fans, or anything bolted through the roof. A stain below a bathroom is a pipe boot until proven otherwise. Timing narrows possibilities without proving one source. Long rain, wind-driven rain, snowmelt, plumbing use, condensation, and temperature changes point the inspection toward different roof and building details. Record when the stain changes, which fixtures or equipment were operating, and whether attic surfaces were wet so the diagnosis can test more than one explanation.
What to do before the roofer arrives
- 1Protect the room, bucket, towels, move furniture and electronics.
- 2Photograph the stain with something for scale, and note the date and the weather that triggered it.
- 3If the attic is safely accessible, look uphill of the stain for the water trail, rust streaks on nails, darkened decking, matted insulation. Note where the trail starts.
- 4If water is actively dripping during a storm, an emergency tarp may come before the diagnosis, protection first, repair second.
- 5Resist painting over it until the source is confirmed fixed and the drywall has fully dried, stain-blocking primer hides evidence.
Talk to a roofer today
Planning ranges, scope details, and a direct path to request a roofing quote.
Trace the water path before pricing the repair
A ceiling stain marks where water became visible, not necessarily where it entered. Water can move along decking, rafters, underlayment, pipes, or insulation before it reaches drywall. A useful leak inspection connects the interior symptom to an exterior pathway and explains why that pathway is plausible. That means checking the roof above and upslope of the stain, nearby penetrations and transitions, attic moisture patterns, and whether plumbing or condensation could be part of the problem. For the ceiling-stain diagnosis, the final record should connect the interior symptom, entry path, failed detail, repair, and follow-up check.
- Map the stain or drip to the attic and roof plane before sealing the most obvious exterior gap.
- Inspect flashing laps, fasteners, seals, surrounding shingles or panels, and the condition of the supporting deck.
- Look for more than one entry point when staining grows during wind-driven rain or appears in separate rooms.
- Document wet insulation, sheathing changes, odor, or visible microbial growth so interior drying is not overlooked.
- Define how the repair will be checked after completion and what evidence would trigger a wider opening.
- For the ceiling-stain diagnosis, name the entry path and the method that will confirm the repair worked.
Define what a successful repair has to accomplish
A ceiling stain marks where moisture became visible, not necessarily where it entered the roof. The diagnosis should trace the path through the attic or ceiling cavity, check nearby penetrations and flashing, distinguish roof water from plumbing or condensation, and document whether insulation or decking stayed wet. Ask what weather conditions are needed to verify the source and how the contractor will confirm the area is dry after the repair. That evidence keeps a cosmetic patch from hiding an active water path.
Sources
The stain is the receipt, not the address. Water shops upstream.
Related reading and source material
Locate the failed roof area and test the repair boundary: Ceiling stain roof leak
Document cause, consequence, distribution, and uncertainty by slope and detail. Identify what must be removed, how water-control layers and flashings tie into sound material, and which finding would expand the opening or support replacement. Apply that record to the ceiling stain roof leak decision and identify which property finding or written term would change the answer.
Preserve a usable investigation and completion record: Ceiling stain roof leak
Use overview and close-up photographs, measurements, temporary-work receipts, contracts, changes, invoices, product details, and final photographs. Keep observed conditions separate from insurer, code, and contractor decisions.
Additional reviewed references
Related roofing resources
Related services
Updated July 27, 2026
3D Roofs Editorial Team
Editorial Standards