Updated July 27, 2026

3D Roofs Editorial Team
Editorial Standards
Ask a leak-repair specialist where roofs fail and they won't say shingles, they'll say transitions. Everywhere your roof meets something that isn't roof, a chimney, a wall, a skylight, another slope, sheet metal flashing bridges the joint. That metal, and the way it was layered, decides whether your roof is watertight. Flashing is one common leak-path category, but the diagnosis should compare it with the roof covering, underlayment, penetrations, condensation, plumbing, and adjacent walls.
The flashing details that fail
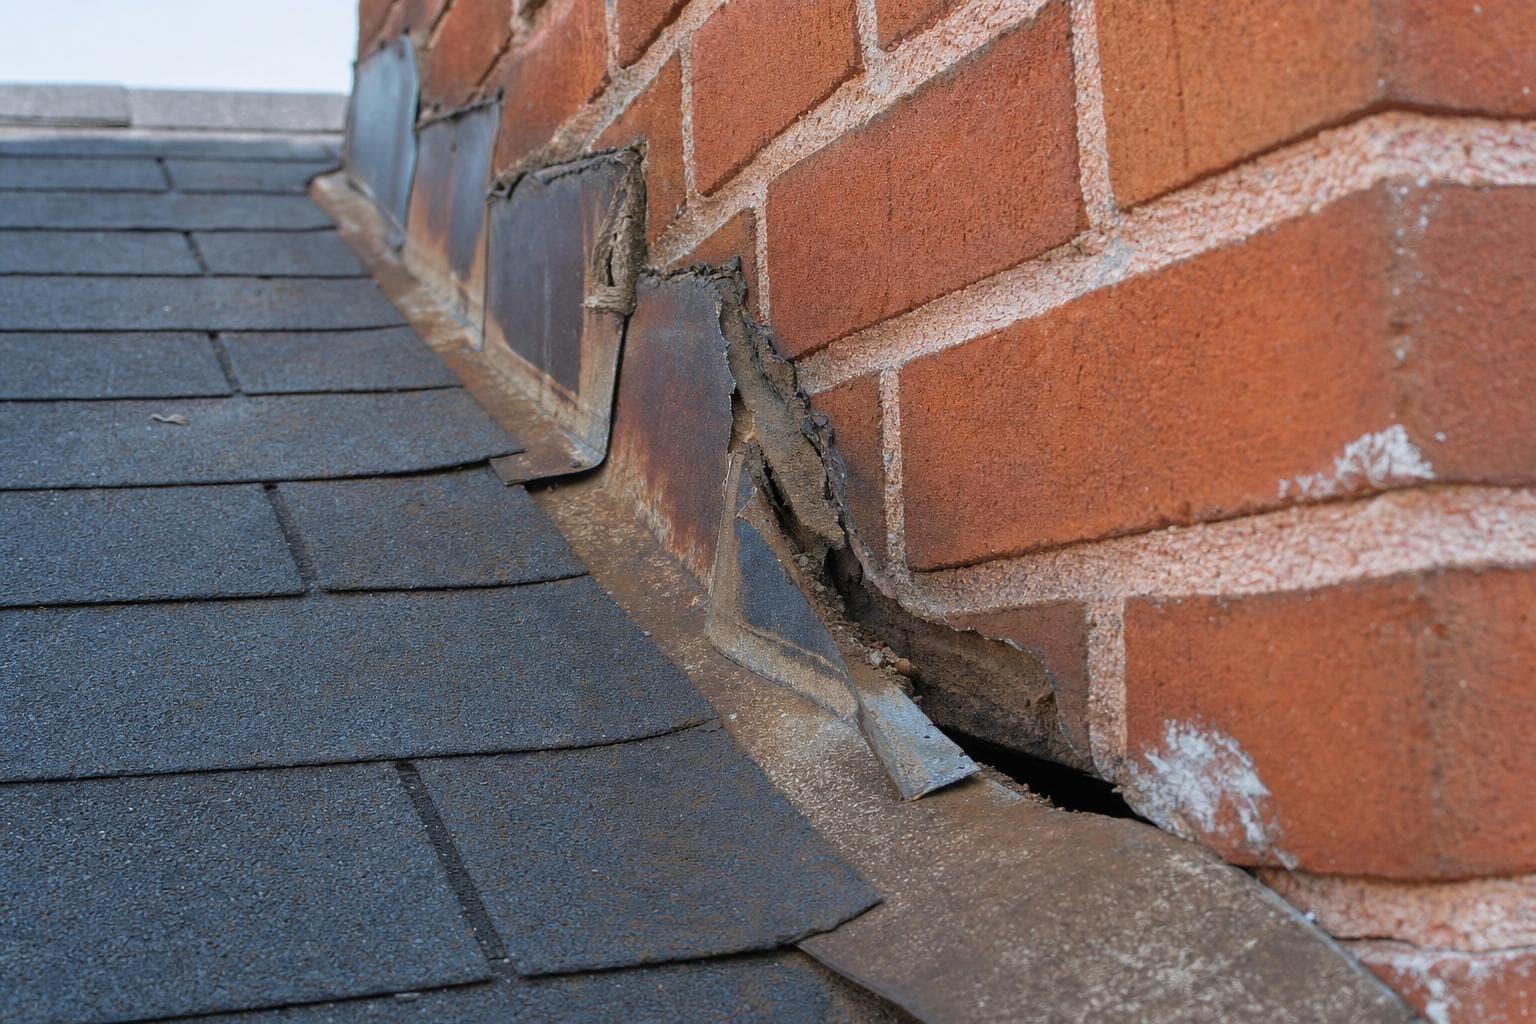
- Chimney flashing, the step-and-counter system around masonry. Mortar joints loosen, counter-flashing pulls out, and old sealant lets go. The classic slow leak.
- Wall (step) flashing, where a roof slope dies into a vertical wall. Each shingle course needs its own step piece woven in; shortcuts here leak behind siding for years before showing.
- Valley flashing, two slopes' water in one channel. Rust, debris dams, and shingles cut too close to the centerline all concentrate failure exactly where the most water runs.
- Skylight flashing: inspect the glazing, frame, perimeter kit, curb, underlayment, laps, fasteners, sealants, and interior condensation before assigning the source.
- Drip edge and gutter apron, missing or mis-lapped edge metal wicks water backward into fascia and decking.
Why flashing fails before shingles
Metal moves with temperature, sealant ages, masonry sheds grit, and fasteners can loosen. Flashing is a system of joints, so a repair has to account for movement and the intended path of water. Reapplying sealant may be appropriate maintenance or a temporary measure in some details, but it does not correct missing, corroded, or improperly layered flashing. A durable scope identifies the failure and restores the relevant metal, underlayment, and counterflashing details.
What a real flashing repair looks like
Step flashing gets rewoven piece-by-piece with the shingle courses, not surface-glued over them. Chimney counter-flashing gets re-cut into the mortar joint and sealed, not smeared. Valleys get cleared, inspected for rust-through, and re-lined if the metal is gone. On a quote, you want to see the detail named: 'rebuild chimney step and counter-flashing' tells you the contractor knows the job; 'seal flashing' tells you they're bringing a caulk gun.
Talk to a roofer today
Planning ranges, scope details, and a direct path to request a roofing quote.
Trace the water path before pricing the repair
A ceiling stain marks where water became visible, not necessarily where it entered. Water can move along decking, rafters, underlayment, pipes, or insulation before it reaches drywall. A useful leak inspection connects the interior symptom to an exterior pathway and explains why that pathway is plausible. That means checking the roof above and upslope of the stain, nearby penetrations and transitions, attic moisture patterns, and whether plumbing or condensation could be part of the problem. For the flashing leak diagnosis, the final record should connect the interior symptom, entry path, failed detail, repair, and follow-up check.
- Map the stain or drip to the attic and roof plane before sealing the most obvious exterior gap.
- Inspect flashing laps, fasteners, seals, surrounding shingles or panels, and the condition of the supporting deck.
- Look for more than one entry point when staining grows during wind-driven rain or appears in separate rooms.
- Document wet insulation, sheathing changes, odor, or visible microbial growth so interior drying is not overlooked.
- Define how the repair will be checked after completion and what evidence would trigger a wider opening.
- For the flashing leak diagnosis, name the entry path and the method that will confirm the repair worked.
Define what a successful repair has to accomplish
A flashing repair should identify the failed joint and restore the intended overlap between roofing, wall covering, chimney, curb, or valley metal. Ask what must be removed to reach the detail, whether step and counterflashing will be replaced or reused, how the new metal will be integrated with underlayment, and how the repair will be checked after completion. Sealant may protect a termination, but it should not substitute for the mechanical laps that direct water downslope. That scope is more useful than a promise to reseal the area.
Sources
Shingles cover the field. Flashing defends the borders, and roofs lose at the borders.
Related reading and source material
Locate the failed roof area and test the repair boundary: Flashing roof leak
Document cause, consequence, distribution, and uncertainty by slope and detail. Identify what must be removed, how water-control layers and flashings tie into sound material, and which finding would expand the opening or support replacement. Apply that record to the flashing roof leak decision and identify which property finding or written term would change the answer.
Preserve a usable investigation and completion record: Flashing roof leak
Use overview and close-up photographs, measurements, temporary-work receipts, contracts, changes, invoices, product details, and final photographs. Keep observed conditions separate from insurer, code, and contractor decisions.
Additional reviewed references
Related roofing resources
Cost ranges are estimates developed from standardized project scopes and reviewed pricing inputs. Government labor and regional cost data are used where applicable. See our Pricing Methodology for the exact sources, calculations, and review date. Actual prices vary by property, scope, materials or equipment, location, and provider.
Related services
Updated July 27, 2026
3D Roofs Editorial Team
Editorial Standards